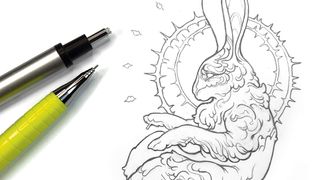
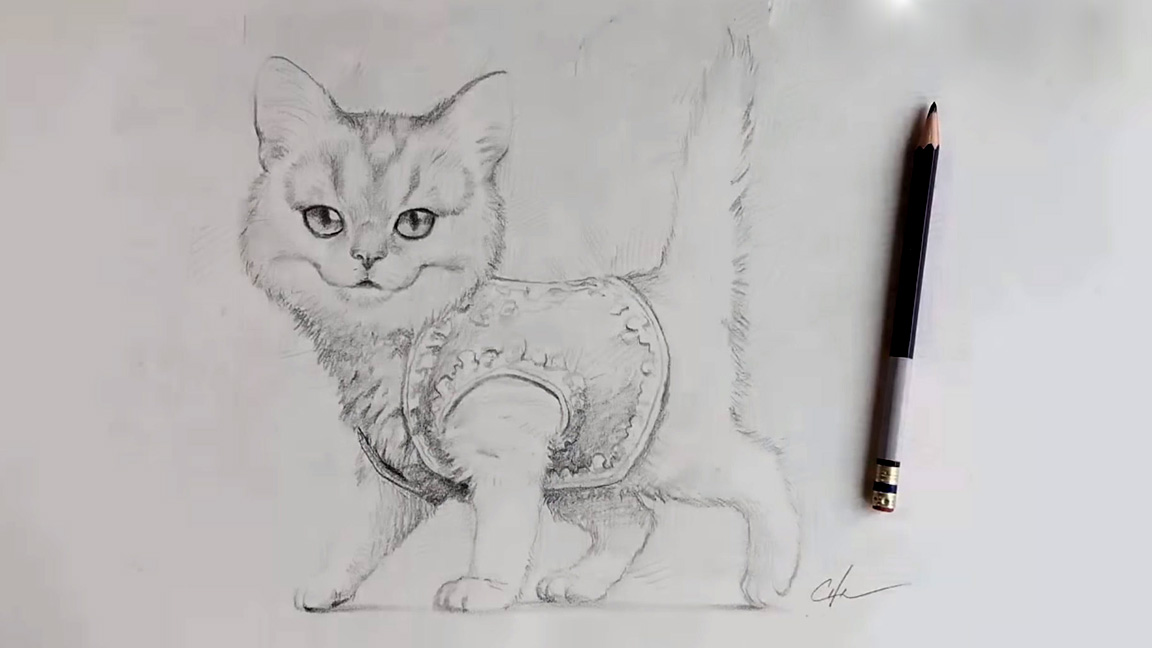
3d drawing with pencil easy
Pencil drawing techniques: Pro tips to sharpen your skills
These pencil drawing techniques from superlative artists will help you take your drawing skills to the next level, whether you're using graphite pencil or coloured pencils.
For many artists, pencil drawing is the skill that introduced them to the art globe, and even if you've moved on to a different medium, understanding how to draw with a pencil can help you ameliorate your skills elsewhere. These pencil drawing techniques comprehend everything from the basics of mark-making to avant-garde processes to button you out of your comfort zone.
We'll also offer communication on the tools and materials y'all need to know, such as blending stumps, paper options, and different erasers. For some extra inspiration, check out the most unbelievably realistic pencil drawings we've ever seen.
Short on time? The video above, from character designer Bobby Chiu, runs through some pencil drawing techniques in activity. For more than in-depth advice on composition to how to capture light and shadow, have a look at our art techniques commodity, for practical ownership communication see our guides to the all-time pencils and all-time pencil sharpeners. Or, for inspiration, have a wait at this roundup of unbelievably realistic pencil drawings.
Pencil drawing techniques
01. Use the correct grip
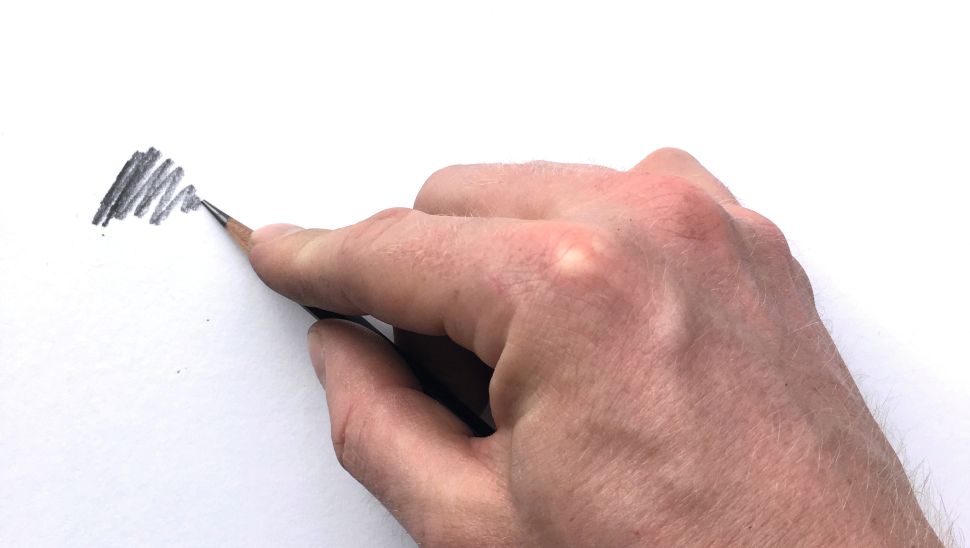
The commencement step is to master how to hold a pencil correctly. Chiu recommends holding the pencil similar you lot could a piece of charcoal, and using the side of the lead to describe, rather than the signal. This helps go on the pencil sharper for longer.
"When covering large areas, I shade with my pencil perpendicular to the line I'm drawing to get broad, soft lines," he adds. "For details, I concur my pencil parallel to my lines to go precipitous, narrow marks. The only time I use the point is when I'thou working on intricate details."
"Information technology is important to consider where you are making your marker from – fingers, wrist or shoulder," adds artist Jake Spicer.
02. Consider your lines
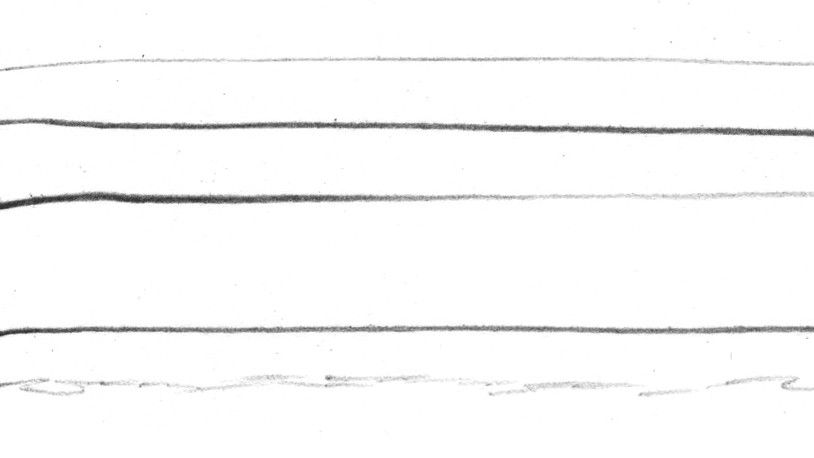
The kind of marks you're making will shape the feel and look of your pencil drawing. Things similar how fast you draw a line and the weight you lot put into a stroke will change the await of the line. "A heavy line is night and definite; a lightly drawn line is stake and exploratory," says Spicer. "When you are starting out, try to avoid uncertain, feathery marks."
03. Offset with an underdrawing
Many artists prefer to get-go their pencil drawing by laying out the scene with a rough, lite underdrawing – this can be specially useful if the end game is a precise line drawing. "Having a more fluid foundation helps you meet the finish upshot without the intimidating commitment of getting everything perfect," says artist Timothy von Reuden.
For a pencil underdrawing, make sure you employ a difficult lead (effectually 2H) to ensure the lines are low-cal and like shooting fish in a barrel to erase. Alternatively, y'all could use a digital underdrawing, printed at one per cent Opacity. Either manner, make sure this acts every bit a foundation rather than a strict guide. "I strongly believe in letting intuition take over in the creation process, and then I work with the underdrawing more as a guideline," continues Von Reuden.
04. Piece of work left-to-right
Pencils are prone to smudging, and the softer they are, the more difficult it is to keep things clean. Nonetheless, planning which expanse of the composition yous piece of work on first tin can help. Essentially y'all don't want to be resting your hand on areas y'all've already fatigued, which means that unless you lot have an unusual pencil grip, you want to exist working top to bottom. And then correct-handers should work left to correct, and lefties move correct to left.
05. Endeavor a bullheaded contour drawing
One mutual exercise to start out with is blind contour cartoon. "Ready a subject in forepart of yous and gear up your heart on the top of it, placing your pencil on your paper. Without looking downward at the paper, trace your eye around your subject, following its edges and contours, and every bit you practise so, let your pencil follow the aforementioned journey on the paper," explains Spicer. "Draw in a unmarried, unbroken line and don't look back at the drawing until you are finished."
The event volition look odd and incorrect, but that's not a problem. The aim of this is to aid you describe confidently and unselfconsciously, and it'south a great way to overcome a fear of staring at a bare folio. "Repeat the exercise regularly as a warm up to get your hand working together with your eye," suggests Spicer.
You can accommodate the practise by flicking your eye downwards to the page at regular intervals, and trying to adjust your line manner and weight to accurately depict what yous meet (y'all're yet using one, unbroken line). "Don't aim for precisely authentic proportion, instead aim for an honest procedure of looking and mark making, without overthinking the drawing," he concludes.
06. Vary line thickness
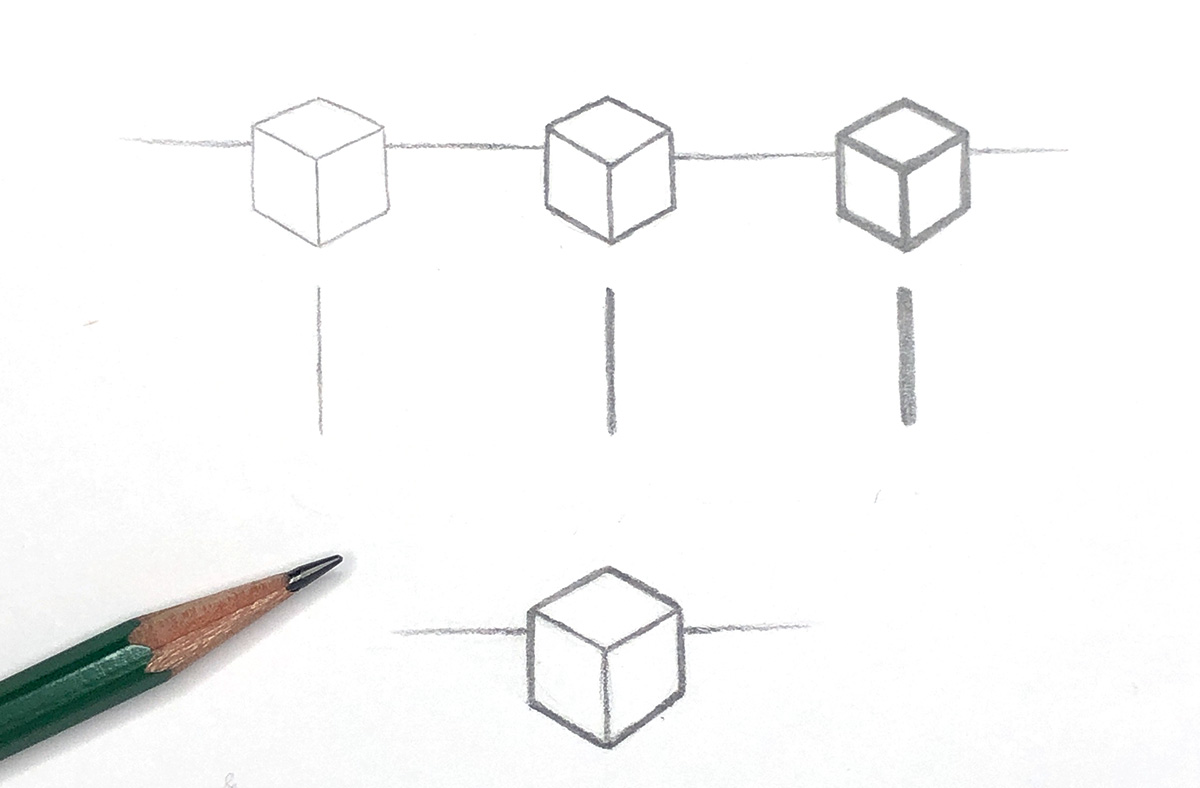
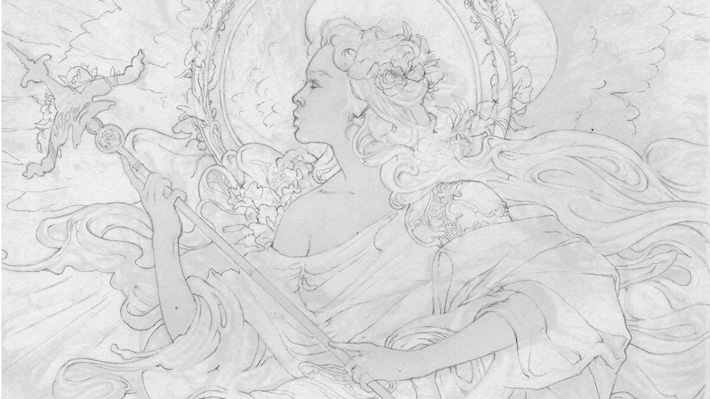
Varying the thickness of the line you use help guide your viewer through your cartoon, explains Von Reuden. Thicker lines can assist indicate importance, or tell the viewer that something is in the foreground of the scene. They tin likewise be used to distinguish between two separate, overlapping objects – a thicker line on the exterior of an object an help differentiate the outside lines of the subject matter from the lines that represent the details inside.
In the instance above, you lot can see how different line weights can be combined to make a form appear more three-dimensional.
07. Mix upwards shading techniques
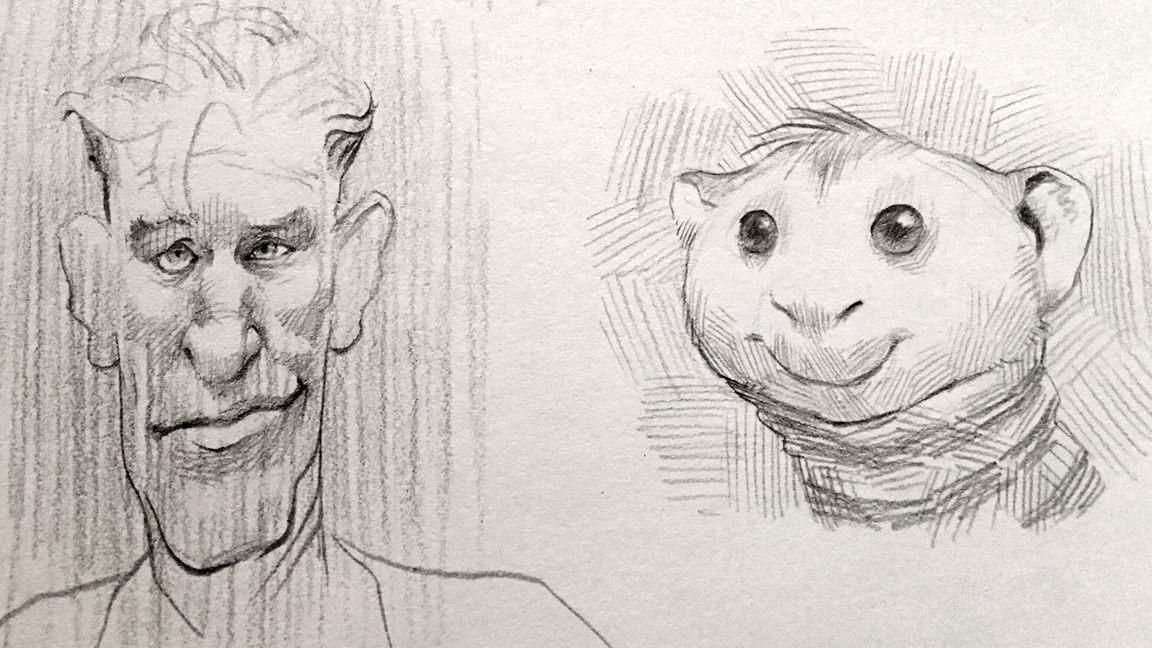
At that place are lots of different pencil cartoon techniques relating to shading. Chiu uses 2 chief approaches. The first is with all the lines going in the same direction. "This makes my shading announced more cohesive, and helps my details pop out from the lines I'm using for shading," he explains.
The second method involves working in patches of shading, to aid define shape. "Patches of lines go around the form, which assistance keep things in perspective," he says. This technique is besides corking for backgrounds and creating texture.
08. With detail work, control your lines
If you're working on a detailed area, be wary of your pencil line. "When information technology comes to creating cleaner and tighter line work, staying consistent is cardinal," says Von Reuden. "Non only should you be enlightened of the expect of your line but also the pressure y'all're applying to the pencil and on the paper. Be actively enlightened at this phase and don't rush it." He suggests regularly stepping back to check the overall effect of your work, and ensure you're keeping your line steady throughout.
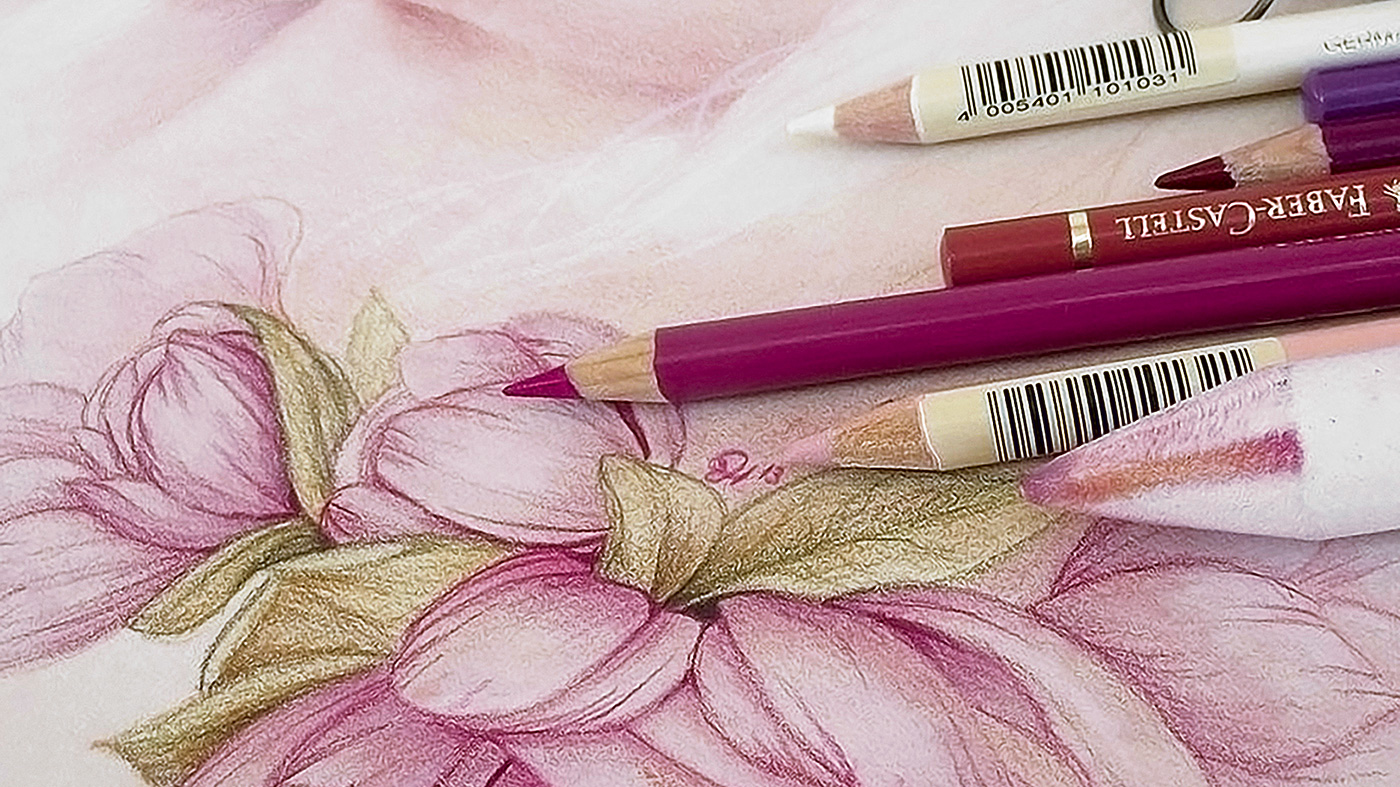
09. Master blending
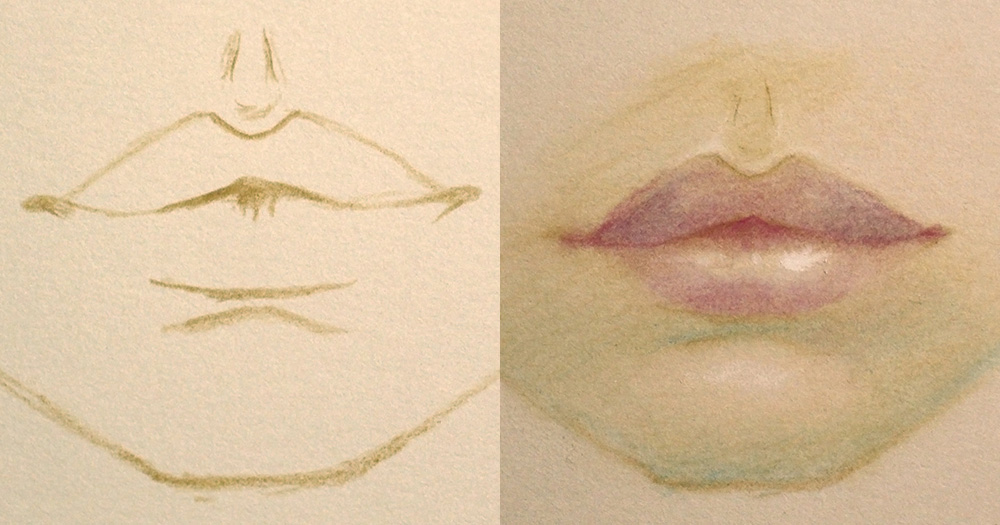
US-based artist Jennifer Healy has a specific procedure for blending her coloured pencil work. She starts with an outline, to check the form is correct before committing to coloured pencil (it's much harder to erase coloured-in areas than an outline). It also helps her plan where the highlights and shadows will fall.
She then builds up color using subtle layers. "I like to start out with soft gentle layers to gain a amend idea of lighting placement, shadows and the colour palette," she says. Afterward each layer she blends gently using the blending stump.
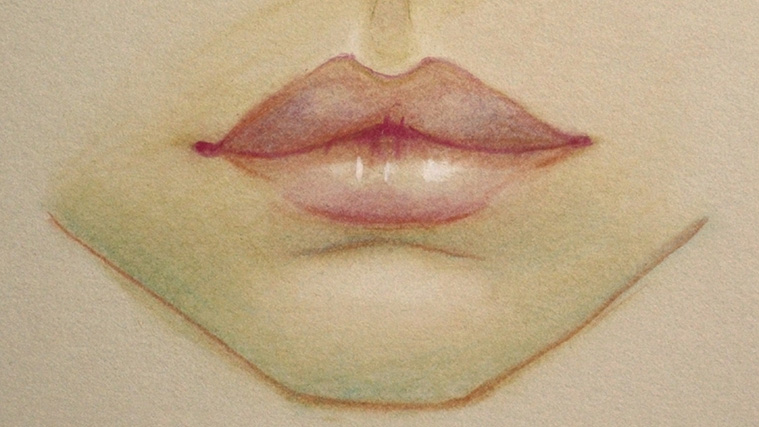
One time she has reached a stage she's happy with, she moves on to the terminal footstep: adding an outline. For this terminal layer, Healy uses coloured pencils alone, and does not blend with a stump.
10. Start lightly and build from in that location
"When I start drawing, I program and explore using loose lines, and avoid committing as well early with hard, dark lines," says Chiu. "As I progress my lines volition alter, and then checking and rechecking my work is vital. I darken my lines and add details at the end. I don't focus on i area for too long to prevent overdrawing."
11. Make clean upward afterward yourself
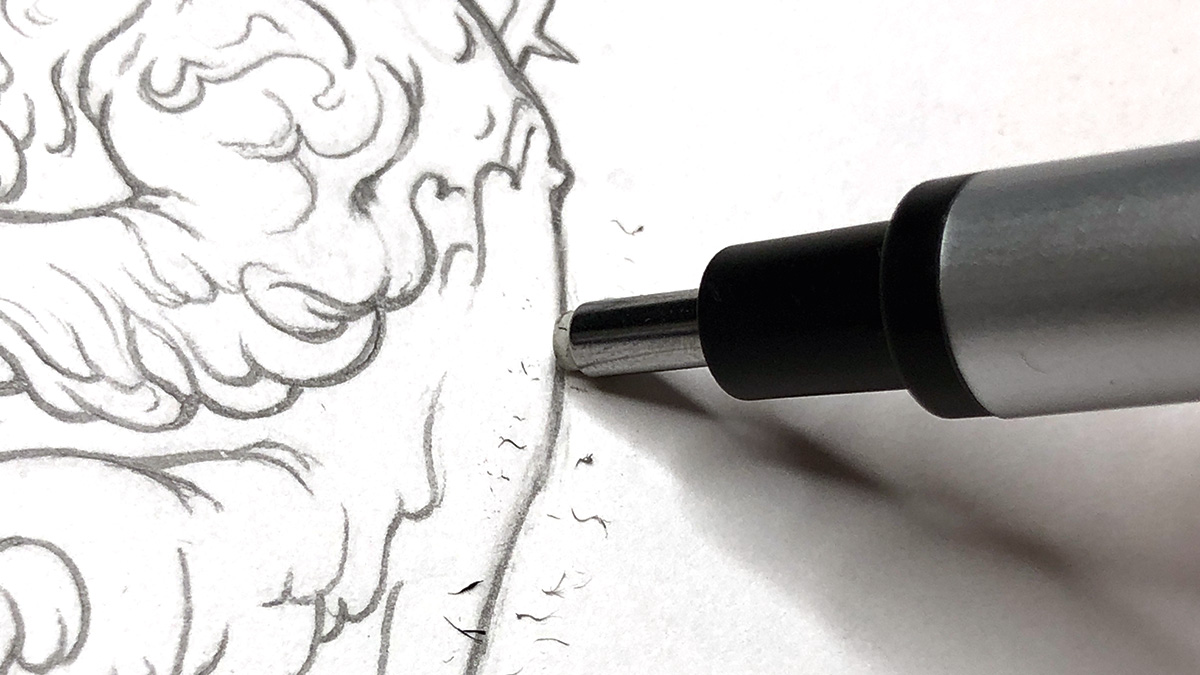
Your eraser can be just as important as the pencil itself. At that place are a few different types (encounter the Tools section for more than on this), but whichever you choose you desire to brand sure it's shut to mitt whenever y'all're working. "Whenever a line gets besides thick, I either erase the entire line or try to line upwards the eraser border to slim down the existing line," says Von Reuden. "I similar to make clean upwards during the unabridged process and at the stop practise a concluding sweep to make sure I didn't miss an area earlier calling it done."
12. Bank check and recheck
Before you move on to stronger lines and detail work, it's essential to brand sure you have the correct grade downward. Chiu's advice is to check and check again. "I have to nail down my cartoon's underpinnings before I tin add together details. I actually avoid guessing at the details; I desire to brand sure things are symmetrical and look right before putting downwards stronger and harder lines."
He also suggests looking at your work in a mirror or through a camera. Considering different vantage points is a great fashion to highlight if annihilation is off. "I constantly ask myself, does this experience right? If anything seems off – even if I tin't immediately put my finger on what it is – I trust my gut and troubleshoot my drawing before continuing."
13. Know when to stop
The majority of artists have a tendency to tinker with their piece of work – even afterward they've signed their name. "I can always notice something to modify if I await difficult enough, so it can be difficult to tell when a piece is truly finished," says Chiu.
All the same, be wary of overworking your piece. "Eventually, I make a conscious decision to put my drawing away and start something new," he continues. "That's when I consider my drawing done. Well, perchance..."
Utilise the right tools
14. Pick the correct pencil
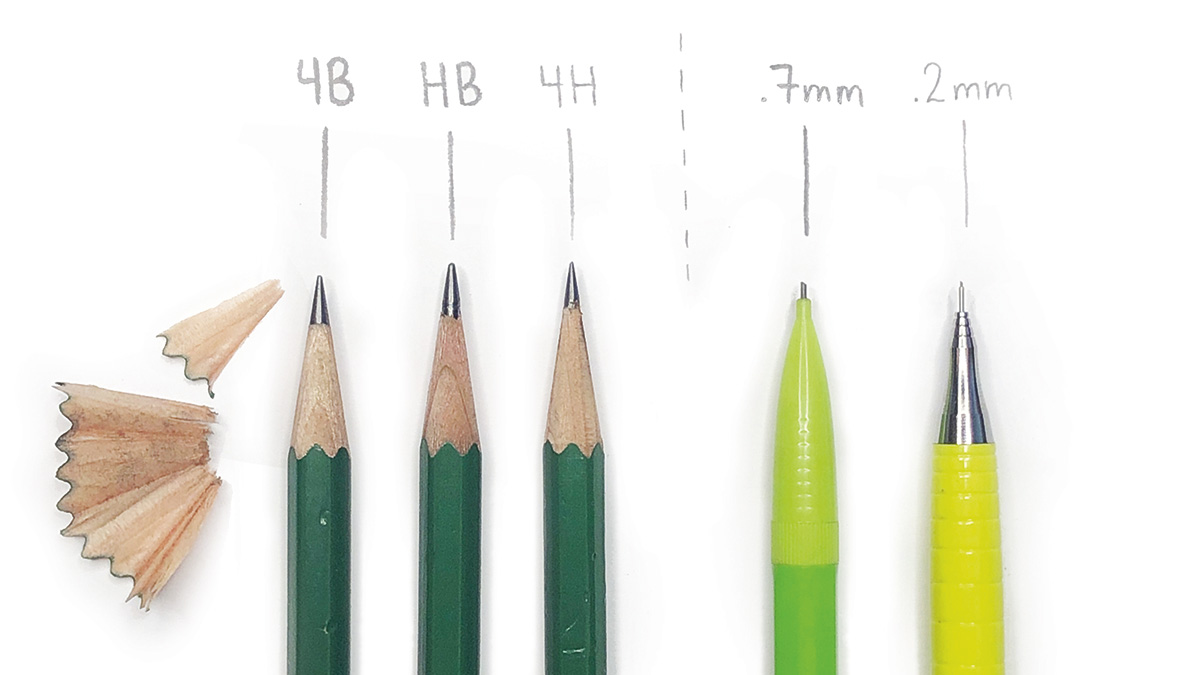
The pencil you cull will have a big bear on on both the techniques you can utilize and the look of your find artwork. Different pencil types are better for different styles of artwork, and you lot also need to consider the hardness of your lead.
Traditional graphite pencils are available in a scale of hardness from 9H (hard, pale) to 9B (soft, nighttime), with HB and F sitting the center of the range. "Typically, the H grades are suited to technical drawing, while B grades are ideal sketching pencils," explains Spicer. He suggests a 2B or 3B pencil is a good place to start with full general pencil drawings.
Then you lot need to pick the type of pencil. Traditional graphite pencils tend to round out apace, and then need regular sharpening to produce a consistent-sized tip. The softer your pencil, the more sharpening y'all'll need to do. Traditional pencils are keen for shading, peculiarly larger areas.
The other principal option is a mechanical pencil (meet our guide to the best mechanical pencils for drawing). These offer make clean, crisp edges, and are better at maintaining a consistent line. You don't need to sharpen them, either. If you're creating a large artwork, bear in heed that a mechanical pencil can slow the drawing process. For a more in-depth look at your options, take a look at our guide to the best pencils.
15. Acuminate correctly
"Some drawings require a fine, sharp point for pinning down a crisp line, others a broad, flat side to the pencil pb for blocking in tone. Sometimes, a blunt point can serve your purposes," says Spicer. "Whatever your preference, ensure you lot always have a sharpener on hand."
Again, in that location are a few options here. Choose between a regular handheld sharpener (portable, easy to utilise), a desk-mounted helical sharpener (typically longer-lasting, and will grind the pencil to a longer point) or a craft pocketknife (become the bespeak you want, but there's some danger of slicing your fingers off).
16. Protect your paper
This is a valuable pencil drawing technique for beginners: put a piece of paper nether my hand to avoid smudging your cartoon while you're working. Information technology seems obvious, merely it can be the downfall of a great piece of work!
Healy likewise prefers to mount her paper on a lath, attaching it using a layer of matte medium. This helps keep things bully, and provides a solid surface to piece of work on.
17. Explore different paper textures
The surface texture yous're working on will make a big difference to the furnishings you can create. This is referred to as the grain or 'molar' of the newspaper. A rough tooth is more visible, and the ridges will grip the colour from your pencils.
With a smooth tooth, the ridges are very fine, and in that location's less grip. Healy finds this kind of paper provides an easier surface for blending coloured pencils, although she warns that it'due south also easy to run the colour off the surface.
18. Invest in a putty eraser
There are a few different types of eraser, and each is suited to unlike things. Many pencils have a small eraser caput, which is platonic for thinning out lines that get too thick. However, don't rely on this alone: you'll also want to invest in a kneaded eraser. This has a putty-like consistency (information technology'southward sometimes chosen a putty eraser), and you knead it before and after use.
"A kneaded eraser is all-time for lightly picking upwards the coloured pencil bounden off the paper. This works wonders when correcting mistakes, or if yous're deliberately lifting color from an surface area such as the eyes," says Healy. A glue eraser has a more than solid consistency, and is better if y'all're trying to fully erase a coloured-in surface area.
19. Try a stump for soft blending
How you blend your work can take a big bear upon on the final result. For a soft composite effect, try a blending stump.
"After each low-cal layer, I very gently blend the coloured pencils with the stump," says Healy. "Don't push too hard or the colour will stick, making information technology more difficult to softly blend. I repeat this process as frequently equally I need. Subsequently many layers information technology produces a very soft and delicate expect."
This technique requires a trivial trial and error, though. Healy warns that if you alloy besides softly, the stump tin can pick upwards color that you've already layered on the paper.
Advanced tips
20. Unify your colours
Having a uniform approach to colour will help bring cohesiveness to your work. "Information technology's a skilful idea to brand sure that your artwork has unifying colours," says Healy. "This consists of a particular colour palette, mood and a style of spreading these across the entire art piece."
She likewise suggests creating a harmonious base past using tinted newspaper or adding a background wash of colour (in pigment). "This will testify through whatever you lay down on top of it, thus giving it an appearance of cohesion. When I apply coloured pencils, I'grand addicted of using tinted paper produced by Kraft."
21. Try unlike approaches to outlines
The side by side drawing technique concerns line weight. As well as demarcating unlike objects, lines can help emphasise shadows. "Thicker lines tin fade and disappear into the shadows, which tin help convey the 3D grade," explains Chiu.
Across that, different artists have dissimilar approaches to lines – yous need to find the way that's right for you. "I prefer to use a singled-out outline in my artwork, whether it's using sparse outlines or assuming outlines," says Healy. "It can assistance pinpoint the viewer'southward eye to a sure area. Information technology also gives a stylised look, if that'southward what you are hoping to achieve."
Chiu, however, prefers a different arroyo. "I try to avoid outlining my drawings because this tends to make things look flat and deadens the 3D effect. Breaks and spaces in my lines prove course in the lights and shadows."
22. Draw on your own experiences
"Dip into your experiences to add a special layer of actuality to your piece," suggests Healy. "This ways using something like a memory, feeling or olfactory property when creating your work. For example, the special feeling y'all experienced when sitting down with a friend at a coffee shop, or a memory of a childhood experience. You lot can be abstract or utilise hyperrealism. Whatever you choose makes the piece unique to you lot. I've found that people resonate with these pieces the well-nigh."
23. Utilise contrasting concepts
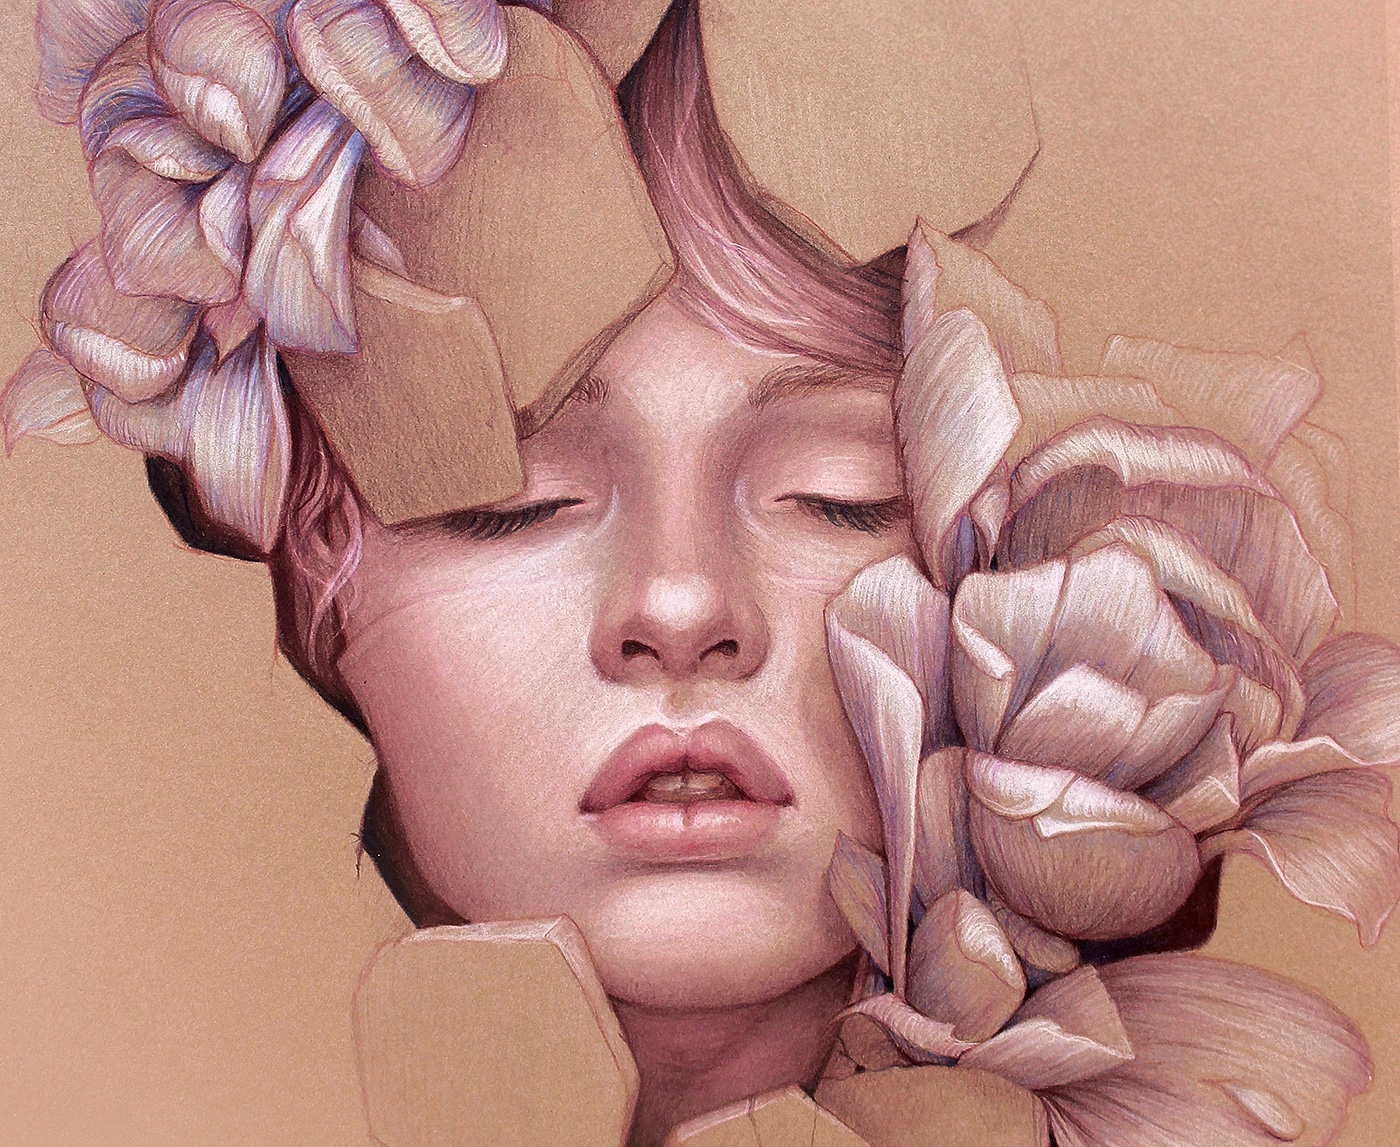
One cartoon technique Healy uses in her work is to use contrasting concepts within a piece of work, for example, juxtaposing beauty and ugliness. "I'll employ the beauty of colours, flowers, the softness of pare or pilus, and the female form. I'll also tend to use something that'south the opposite to all of that, such equally bones, insects, sharp teeth, or annihilation that may provide discomfort to the viewer," she elaborates. "Somehow this provides an interesting concept to a piece. Especially when the 'ugly' parts are harder to spot at get-go. To me this is a very stark representation of what life is like."
24. Effort combining pencils with watercolour

While pencils on their own tin can be used to create a wealth of different furnishings, information technology can be interesting to combine them with other media. For instance, in her work, Healy likes to combine watercolour and coloured pencils. It'due south of import to showtime with watercolour and and so layer coloured pencils on tiptop, she explains, because pencils can create a waxy surface that repels liquid, and prevents the watercolour from soaking into the paper.
"This is a fun technique to test out," she says. "Both mediums take unique qualities and textures. Combining the two elements creates a medium all of its own."
Also read: The best watercolour pencils you tin can buy right now
25. Break out of your comfort zone
While these pencil cartoon techniques should help you sympathise the essentials of the medium, sometimes you need to throw the rules out of the window and find what works for you. "At that place's nothing incorrect with stepping exterior of the box if it means achieving the outcome you want," says Healy. "Trial and mistake will occur when yous stride outside of that box. Just don't be intimidated! The process is entirely fun."
26. Create fabric
Textile can range from sleek and shiny to matte and boring. How you shade information technology will help sell the idea of the fabric you lot're trying to depict. For this sketch, von Reuden is trying to capture the golden folds of fabric constitute in the original paradigm. He began by outlining the shapes and blocking out areas of shadow.
27. Categorise your material
Von Reuden explains how you can add together value and shading to create further layers of depth and weight. He says, "when drawing and recreating cloth, the types of wrinkles created can all be placed nether three separate categories: hanging/relaxed, stretched/tension, and scrunched/compressed."
"Hanging fabric tends to be loose and have a flowing appearance. Stretched fabric creates long lines, usually with a bespeak of support. Compressed fabrics agglomeration into each other, creating scrunched-looking areas."
Some of this advice comes from ImagineFX , the globe'south best-selling magazine for digital artists. Subscribe here .
Related manufactures:
- How to master colour theory
- Go started with ink drawing
- How to draw a rose
Related articles
Source: https://www.creativebloq.com/art/drawing-techniques-7-fundamentals-pencil-drawing-71621181
0 Response to "3d drawing with pencil easy"
Post a Comment